Irish Fermentalists

For the fermentation enthusiasts out there, I’ve started a Facebook group called Irish Fermentalists.
This is a friendly informative group for beginners through to ‘experts’. Please use this group to ask questions about your ferments, kombucha, kefir, pickles, cheese, yogurt, miso, ginger bugs, sauerkraut, wild sodas etc. Show us photos of what you’re making, share interesting documents in our library- and connect with other like-minded individuals.
If you have cultures or scobies to share, please post that here for others who may be looking. Please feel free to share your fermentation related events on this page.

https://www.facebook.com/groups/irishfermentalists/

Natural cheesemaking at Fumbally Stables 28 October 2017

Courtney Tyler with Minty the goat

I’m delighted to be a part of the Eat:Ith Food series in Fumbally Stables. Next week I’ll be teaching a half day workshop on natural cheesemaking. These will be simple basic cheeses that you can easily make from home using natural and renewable cultures such as milk kefir.

This is a hands-on workshop guided by Courtney Tyler, where you will get to make your own cultured milk recipes, including:

  • milk kefir
  • kefir strained cheese (cow’s milk)
  • raw chevre cheese (goat’s milk)
  • how to use whey

All participants will take home print-outs on the cheese making process, as well as kefir culture, kefir cheese & bottle of whey. Class size is limited to 16 people.

Booking is here: http://eat-ith.com/home/about/


Basics of Food Fermentation in Hunting Brook Gardens 21 October 2017

sauerkraut in the making

On Saturday 21st October Courtney will be hosting a Basics of Food Fermentation workshop from 1-4.30pm.

These will be interactive, hands on learning experiences where you’ll make your own creations to bring home with you. There will be some delicious snacks and samples to taste. You’ll go home with all the knowledge you need to safely start your own home ferments.

Together we will be making sauerkraut, beet kvass and pickles using the magic of lacto-fermentation.

Bring your fermentation related queries, some jars to bring home your ferments and yourselves.

Booking here: https://www.eventbrite.ie/e/basics-of-food-fermentation-and-pickling-at-hunting-brook-gardens-tickets-37156095883


How to brew water kefir

How to brew water kefir.

I think I’ve decided that water kefir could be my favourite ferment of them all.

It’s exciting to me to have such a healthy fizzy herbal soda, where I can control the quality of the ingredients. It’s also done in such a relatively short period of time from start to finish.

I’ll try and lay out the bare bones basics of how easy it is for those of you who ask me!

  1. Dissolve approximately 3 tablespoons of sugar in a mug of hot water. Stir to dissolve. Top up with another 3 mugs of cold water. Add the grains. I usually use a glass vessel of 1-2 litre size for this- and once the grains have been added to the sugar water I cover the top with a cloth or tea towel and rubber band. If I have a spare lemon in the house, I might also squeeze in a half lemon at this point, but this isn’t necessary.
  2. Let this sit out at room temperature for 24-48 hours. Taste from time to time and when it’s at an agreeable level of less-sweetness and not too tart, I strain the grains from the liquid.

Repeat the 1st step with the grains- as they need this sugar water to ‘survive’.

3. Take the strained water kefir liquid and here’s the fun experimental part: either drink as is/ add lemon or flavouring, add to a smoothie or fruit juice if you don’t want carbonation- it’s ready to drink anytime!

or if like me, the fizz is what you’re looking for- bottle the water kefir liquid into a Grolsch beer bottle style clamp down lid bottle (or a plastic bottle for those who err on the side of caution- take note that this can create a dangerous amount of carbonation- be warned!) and sweeten with a cordial, syrup, fruit juice, fresh/dried/frozen fruit of choice, ginger, lemon juice, or a sweetened herbal tea. It’s best if you make it slightly sweeter than your preference at this stage as the extra sweetness will be what creates your carbonation. Clamp down the lid firmly, label your bottle with your flavourings and the date- and leave out another 12-24-48 hours at room temperature, then move to the refrigerator. Chill and enjoy!

The benefit of the plastic bottle, especially as you are learning, is that you can ascertain when the bottle has fully carbonated, as the fizz will expand the plastic bottle and it will become rock-hard. As soon as this happens, you can move to the fridge and enjoy when cool.

Be warned: If you don’t use a glass bottle with the rubber grommets/ gasket, there is a very real risk of the glass exploding.

Best if made and drank within days as the carbonation will keep building up as fermentation progresses.

My favourite flavour combinations:

ginger and lemon

elderflower cordial makes a nearly exact cheat version of elderflower champagne

elderberry or blackberry and ginger

fresh pineapple

fresh apple juice added 1/4 to 3/4 water kefir makes a lovely light effervescent apple fizz.

This website has another nice explanation about how and why to brew water kefir:

Water Kefir

Or as always, I highly recommend you visit Cultures for Health website and find a rich resource of information including their free ebooks which you can download.

http://culturesforhealth.com/media/docs/Water_Kefir_Ebook.pdf

http://www.culturesforhealth.com/learn/water-kefir/how-to-flavor-water-kefir-video/

Forage Feast Ferment in a Wicklow Woodland 22nd May

Due to the success of the first Forage Feast Ferment we are happy to announce the next event which will take place on Sunday 22nd May 2016.

Run in a beautiful forest setting, this is a perfect invitation to spend the day re-connecting with nature. Only 40 minutes from Dublin, 15 minutes from Wicklow town, yet it feels lifetimes away from the hectic-ness of city life.

Angie Kinsella and Courtney Tyler will offer a day’s retreat to meet other like-minded people, practice mindfulness in a natural setting, and an intro to foraging and food fermentation.

The morning will start off with coffees (would you prefer normal coffee or dandelion root?) and teas and a fun introduction followed by a walk in the woods identifying some wild and medicinal plants, trees or herbs that can also be used as a food.

A healthy meal will have been prepared in advance by Angie and Courtney that will feature some local, seasonal, fermented foods and drinks.

This will be followed by an introduction to food fermentation.  There will be samples to taste.

Everyone is welcome from the beginner to the experienced. What we enjoy about foraging, food and fermentation is that there is always much more to learn.

Please bring some comfortable walking shoes and wellies if needed. Warm and dry clothes to cater for Irish weather. Bring a notebook, a basket and yourself. The event will take place rain or shine!

If you have any food requirements allergies or intolerances, please let us know? We will do our best to cater to your needs.

Payment in full of €85 per person by the 15th May.

We offer a deal price of €150 per couple or if you bring a friend and book at the same time.

Early bird price of €75 each if paid in full before 7th May. Children under 12 are free, but must be booked in.

Book online here to pay in full https://hipsandhaws.com/product/forage-feast-ferment-22-may-2016-booking/

or pay the deposit to hold your place herehttps://hipsandhaws.com/product/deposit-for-forage-feast-ferment

or payment by PayPal to email address: hello@mayfly.ie


Any questions, contact:

Angie at: 086-358-1231

Or Courtney at: 086-376-4189

More exact details will follow closer to the date.
Here is the google maps link to show you where this will take place:


Thanks! Looking forward to seeing you there!

Courtney and Angie

How to make the best homemade yogurt

Homemade yogurt recipe
After many failed homemade yogurt attempts I was delighted to finally discover this method.
Process:
  • Heat the milk to at least 180°F/82°C.
  • Heat milk slowly and gently, with frequent stirring to avoid scalding.
  • It is possible to omit this heating step and make raw yogurt, never heating the milk above 115°F/46°C. But raw yogurt will never be as thick as yogurt from milk that has been heat-treated.
  • Holding the milk at this high temperature, with constant stirring, will result in evaporation and concentration of milk, further contributing to a thicker end product.
  • After heating the milk, you must allow it to cool before adding the starter culture.
  • Once the temperature reaches 115°F/46°C, remove a cup of the milk into a cup or bowl, and stir in starter. I use 1 tablespoon of starter per quart/liter.
  • Thoroughly mix the starter with the cup of heated milk; once it is fully dissolved, mix it back into the full pot of heated milk. Then transfer cultured milk to preheated jars, seal, and place in the incubation chamber, leaving it to ferment undisturbed.
  • Incubated at 115°F/46°C, yogurt will coagulate within about three hours, but if left too long it can easily curdle. I prefer to ferment it a bit more slowly at a slightly lower temperature, four to eight hours at a more forgiving 110°F/43°C. Even longer fermentations can yield more tangy flavor and fuller digestion of lactose.
My Tips:
-My favourite live commercial starter is Mossfield’s organic yogurt. I buy this and then freeze it into smaller portions.
-Less is more! I use only 1 tablespoon of starter to every litre of milk. Many recipes recommend a cup or more. I’ve found better results and a thicker yogurt with less.
-I find a huge difference in flavour of the finished yogurt from using different commercial bio-live yogurts. Some are more tart, some more smooth, etc.
-Use the best quality milk you can find. Full fat is always best. Organic. It need not be raw milk though as you are effectively pasteurizing it before you inoculate it with the new bacteria.
I personally do a large batch at a time and fill a 5 litre cast iron Le Creuset heavy pot with the milk. It helps to hold the heat in, and doesn’t burn the milk on the bottom easily. I then put this into my food dehydrator to incubate, keeping the temperature at around 110°F/43°C for 6-8 hours.
If you don’t have a large food dehydrator, it isn’t necessary and you can use an insulated cooler, a thermos, an oven with just the pilot light on, etc. Many other options available online.

How to make milk kefir

Basic How to make milk kefir
Add 1-2 tablespoons of milk kefir grains to a litre of milk. Or less grains for less milk. Use the best quality milk you can find. Organic full fat cow’s or goat’s milk is best.
Your grains will multiply quickly with pasteurised milk, so give away or compost the excess grains. Or experiment with them!
I always keep some excess grains in a jam jar in the fridge covered in milk, with a secure lid. In the fridge the cold slows down the fermentation and I change the milk once a week. I strain out the liquid kefir and drink it and cover again in fresh milk. This way I’ve got some grains backed up should anything happen to the ones in use!
If I am not ready to make or use the freshly made kefir I add it to a litre bottle in the fridge. I top this up each day with the kefir I’ve made until I am ready to use it. But a good idea would be to make the amount you or your family would like to consume each day.
I use milk kefir most often:
-to soak my porridge oats the night before breakfast the next day. I add some dried cherries, coconut, banana, or maple syrup.
-to soak in flour for pancakes the next day.
-to use in a smoothie
-to make kefir ice cream
-to make kefir cheese
-as a face mask mixed with oats and clay
Although many people seem to like just taking a shot of it when needed, or mixing with juice.
I have also dehydrated some grains to preserve them and have them as back up. They are easy to re-constitute.

Fermented Mung Bean Pancakes

I can’t stop raving about this recipe. Its become a staple in my diet. Its so healthy and versatile and once fermented it seems to keep very well in the fridge. Perfect then to mix with whatever herbs or veg I have to hand and cook up!

Most of the time spent it in soaking and waiting and fermenting. So this isn’t a recipe you can cook for dinner tonight unless you’ve started the process 2 days ago.

Give it a try though, I’m sure you’ll love them too!

fermented mung bean pancakes – revisted

How to make milk kefir cheese

Ever wondered how to make kefir cheese? I bet you haven’t! But won’t you be so glad to know 🙂

It’s easy to make this live probiotic soft cheese. A perfect replacement for Philadelphia Cream Cheese or Boursin.

First you must make milk kefir. (See my post here about how-to).

Milk Kefir Cheese
Strain the finished milk kefir through a square of muslin or cheesecloth. I line a strainer with the fabric and a bowl below it (to catch the whey), and pour the kefir directly into the muslin atop the strainer. Strain from the strainer into the bowl below. This can take many hours. It strains quicker if you hang it. For example tie the corners of your cheesecloth into a loose knot around a wooden spoon. Dangle the wooden spoon over the inside of a large pot. Or hang it from a kitchen cabinet doorknob.
It does help if the kefir you’re adding to the muslin has been fermented for a little longer, or whey pockets are visibly forming. Either way it should be ok. You want the muslin or cheesecloth to be thick weave enough that just the whey slowly drips through. The milk solids will remain in the cheesecloth.
I like to add chives, parsley, garlic and salt. If you’re using fresh herbs instead of dried the cheese will have to be eaten within 2-3 days maximum. It should last up to a week if stored in the fridge.
*Note I clean my muslin directly after use with cold water first then warm soapy water in the sink.  Just before using the cloth for straining cheese or yogurt- I then boil the cloth with water with a little bit of vinegar or baking soda in it, to remove any odours and to sterilise it.

Ginger Lime Water Kefir Recipe

water kefir grains

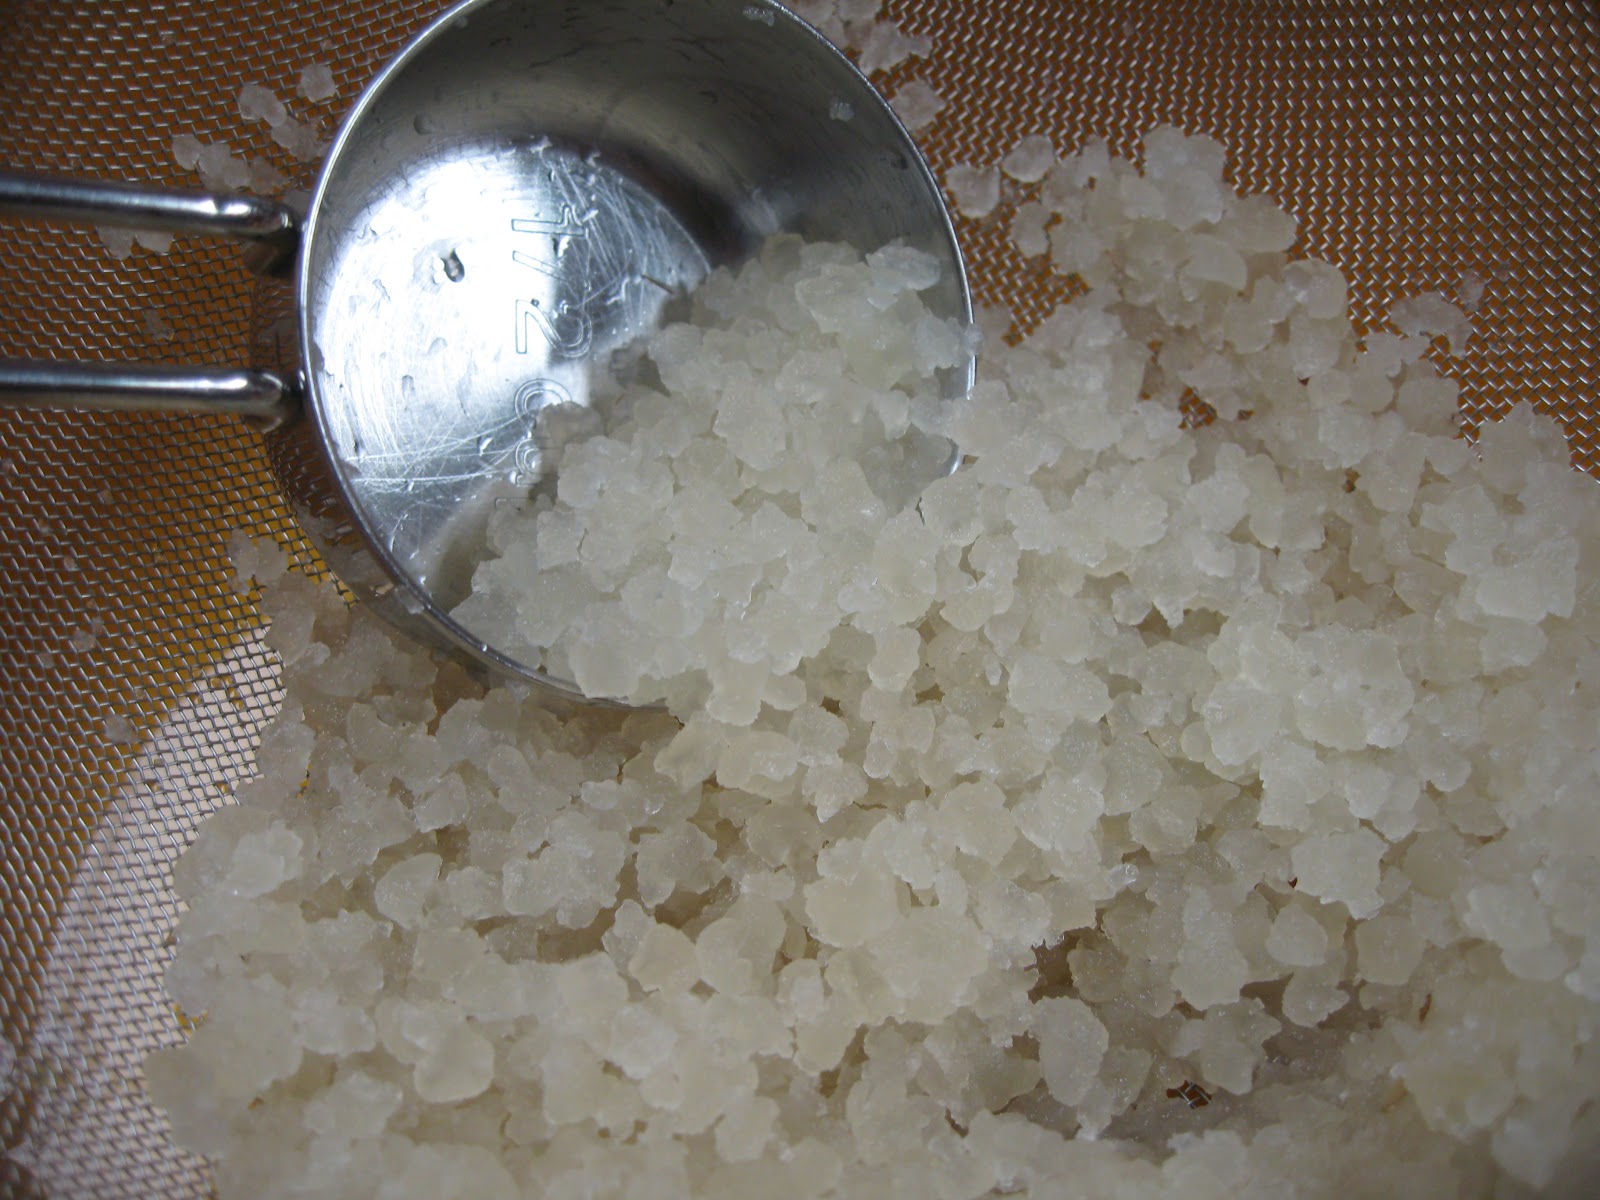
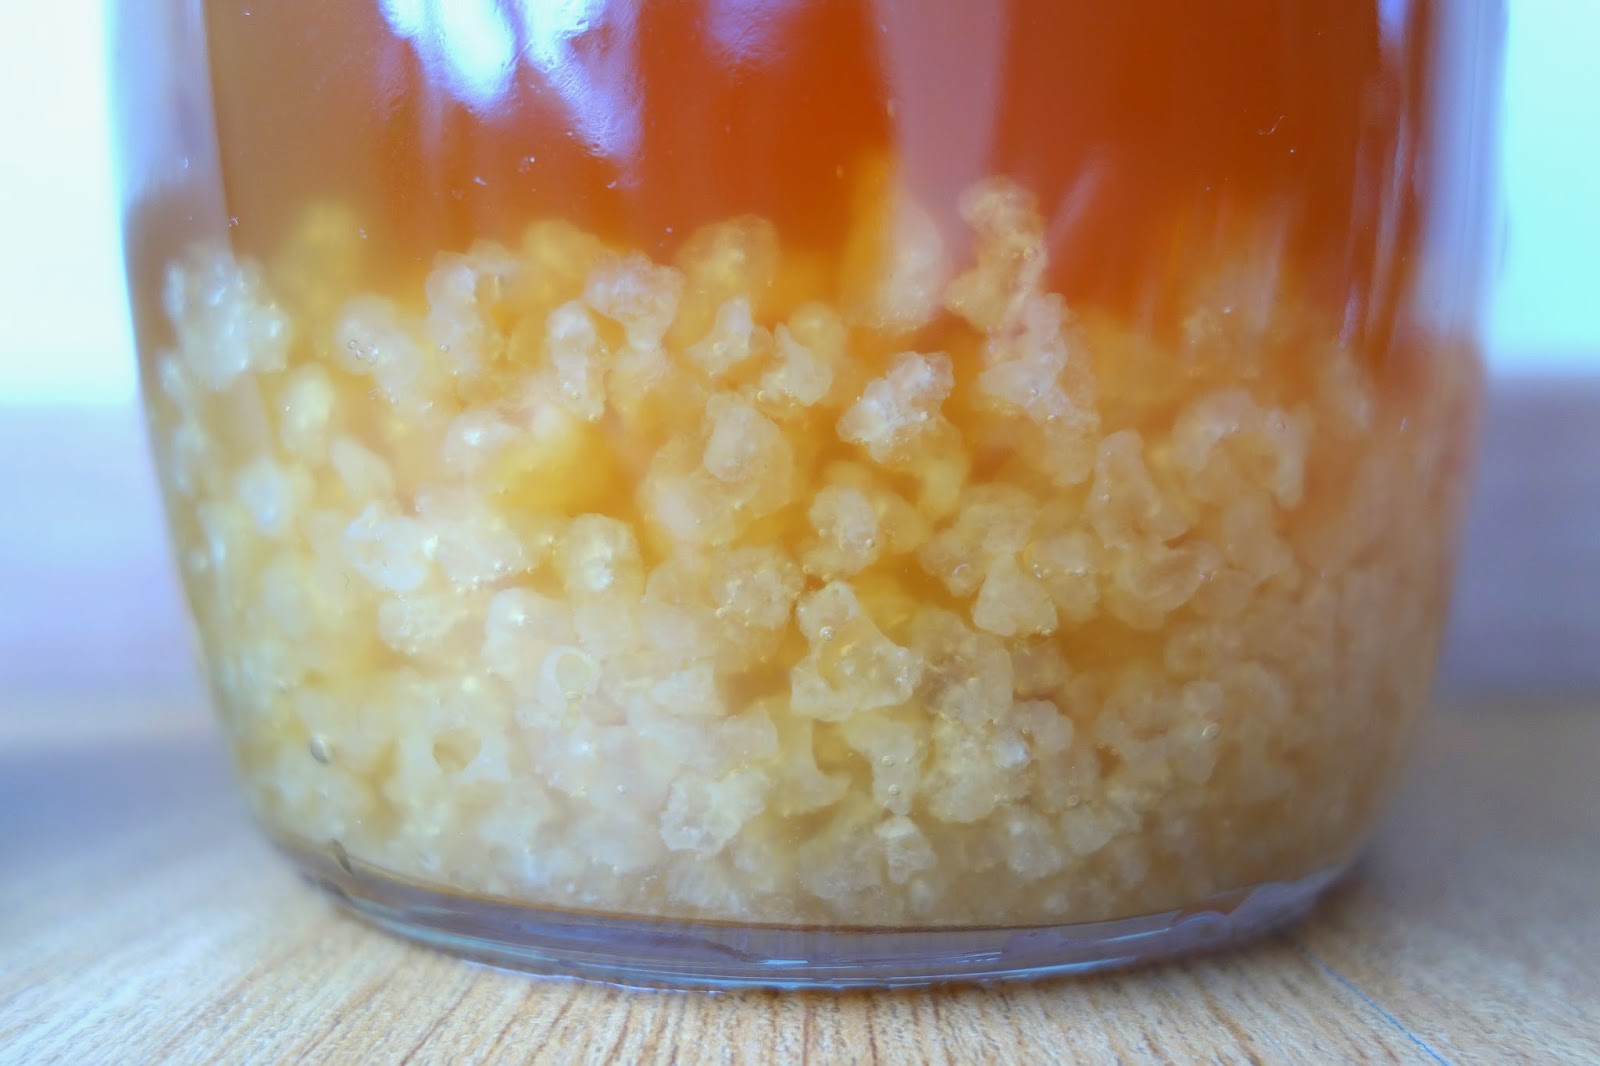
I finally got some more water kefir grains today from Healthy Habits in Wicklow Town.

I had water kefir grains in the past but quickly felt overwhelmed from too many cultures on the go. I am now superhuman (ha, you should see my countertops!) at balancing all of my cultures, so I decided to give it another go.

If you’d like to learn more about water kefir grains and read loads of recipes, one of my favourite websites is Cultures for Health.

This recipe is slightly adapted from Bar Tartine’s Cortney Burn’s of San Fransisco. I highly recommend this cookbook.


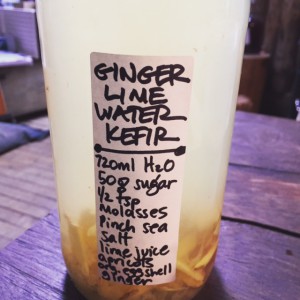
Ginger Lime Water Kefir recipe

Makes 3 cups/ double the recipe if desired. 

Ingredients:


3 cups/ 750ml filtered water, preferably non-chlorinated

¼ cup/ 50 gram sugar

½ teaspoon molasses, preferably blackstrap

a washed, organic eggshell (for added minerals)

pinch of sea salt

2 squeezed lemons or limes, including the peel if organic

a couple pieces of dried fruit such as raisins or apricots

1-2 inches of organic fresh ginger, sliced finely.

¼ cup/ 45 grams water kefir grains

Method


In a 1 litre non-reactive container, such as a glass milk bottle, dissolve the water and sugar. Once mixed, add in all of the other ingredients: molasses, eggshell, sea salt, lemon peel, (save the juice for later) dried fruit, sliced ginger and lastly the water kefir grains. If you add the water kefir grains loosely in a small muslin sack or bag they are much easier to remove after.

Screw the lid on tight and give it a shake to mix everything. Then (importantly) leave the lid on, but unscrewed so that the carbon dioxide can escape. Or use an airlock if you have one. Bottles can and will explode if you don’t take care! If you’ve screwed the lid on, be sure to release the carbon dioxide every 6-8 hours by opening the container.

Let stand in a warm place of 68-72F/ 18-22C for 48 hours. 72 hours if the room is cooler. It should be gently fizzy.

Remove and discard the fruit (you can eat it) and lemon pieces and eggshell. Remove the kefir grains. Strain the liquid through a sieve to catch any other bits or kefir grains.

Stir in the lemon or lime juice using more or less to taste. In Cortney’s recipe, she also adds fresh ginger juice.

Transfer the liquid to flip top bottles such as glass Grolsch bottles with the rubber gasket. Leave at least 1 inch/ 2.5 cm of head space to allow the carbon dioxide to expand. Let stand at room temperature until pressure builds, about 24 hours. You can use a plastic bottle if desired to remove the possibility of explosions, but also to gauge that the pressure has built up sufficiently. Once the bottle feels hard, move to the refrigerator. Refrigerate for up to 1 month. Serve cold straight out of the bottle.

I’d recommend opening the bottles with care. I open them over the sink and with a plastic jug over the top of the bottle in the event of a surprise geizer!

The kefir grains need to be fed, so once removed from the mixture feed them again immediately in a sugar water mixture of ¼ cup sugar/ 50 grams to 1 quart or litre of water. Refrigerate in an airtight container for up to 4 weeks. Drain and add fresh sugar water every 7 days. Or repeat the recipe and start again!

ginger water kefir